New Take on Kohekohe Church
Yesterday I went out to shoot the sunset. From Google Earth I could see that the sun would set in a gap in the hills that was visible from Kohekohe Church. So I got my gear and climbed over the fence at the back of the church and spent nearly an hour shooting until it was almost dark. It’s a spectacular view as over the ridge are some lakes and very interesting shaped hills. I’ll post some later on..
The wind had come up and it was getting pretty cold so I came back to the car to warm up.
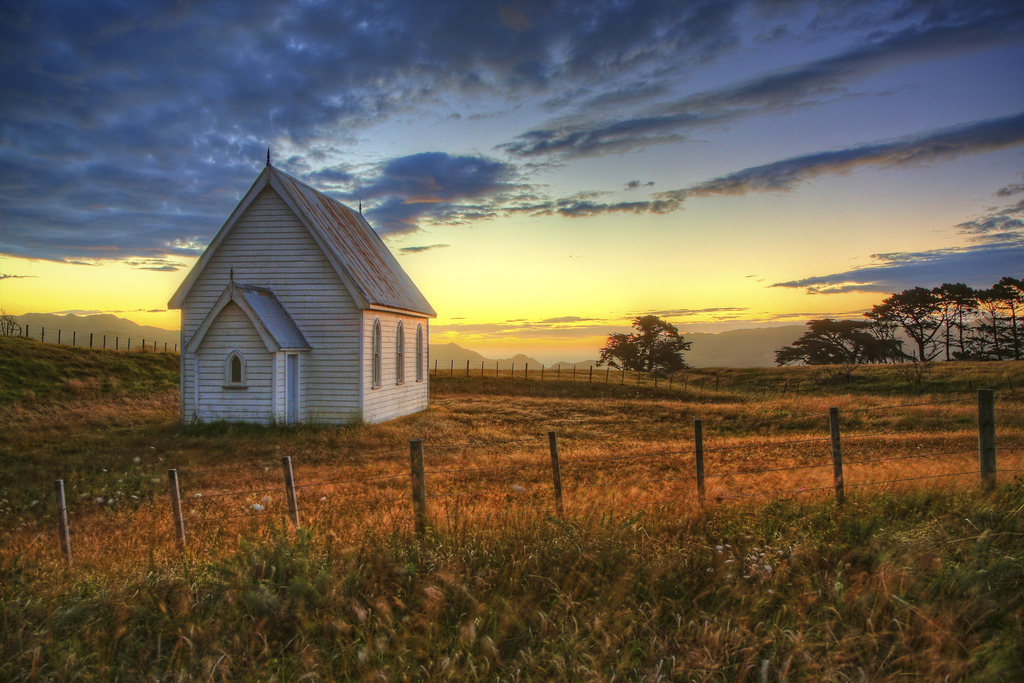
I know from past experience that some of the best shots come from well after the time the sun has gone down, and when I looked at the church I could see that there were some beautiful shots waiting to be had. Here’s one:
The initial process with Photomatix was quite good so it did not require much in the way of Photoshop or Topaz. I tried various things but kept coming back to the original image with just some subtle cleanup. The most obvious retouch was lightening the church a little, and some darkening in the corners to help frame the shot.
Compare this with the other Kohekohe Church shot to see how I’ve progressed. Not only are the colours good in this shot but I like the composition. I like the way the front fence comes down and frames the church. In the very centre of the shot you can just make out the Tasman Sea peeking out from behind the hills. Keep going and you’ll get to Australia. Not that you would want to 😉
Arches at Hamilton Garden
I wanted to post an up-to-date photo to hopeully show the improvement that has come from a year and a half of HDR.
This shot was taken just after new year at Hamilton Gardens
Apart from the normal Photomatix processing, this image has been manipulated in several other ways:
- There were many people about this day, as it was glorious and also the 2nd Jan so everyone was on holiday. I took two sets of three autobracketed shots. These were processed to two HDR images using the same settings. I used Photoshop to pick out the parts from each image where there were no people. In a few cases both shots had people and I had to color-in or clone areas to erase all signs of people.
- I used Topaz Adjust and Topaz Detail to process the images. In most cases I created a background copy layer, processed the top layer then mixed the processed and unprocessed layers to tone down the processing.
- I created several (4) images, each processed in a different way. Then I stacked them all up and picked the best parts. For example, one image had the best brickwork. One had the best ground. One the best sky. And in some cases I mixed from more than one image.
I think the shot works as it’s a strong shot to start with. It has interesting shapes and light. The HDR processing just adds to this.
Waterlilies
The next lens that I had my eye on was the EF-S 17-55mm IS. This covers pretty much the same range as the 18-55mm kit lens. But it has a larger f/2.8 aperture. And by all accounts the optical quality is a lot better.
One of these came up on Trademe (our local version of eBay) at around half the retail price, so I grabbed it.
When it arrived I was surprised at how large it was; about twice the size and twice the weight. It was considerably better optically. Sharper, but also the chromatic aberrations that show up as red and blue fringes that towards the edge of the picture were much reduced.
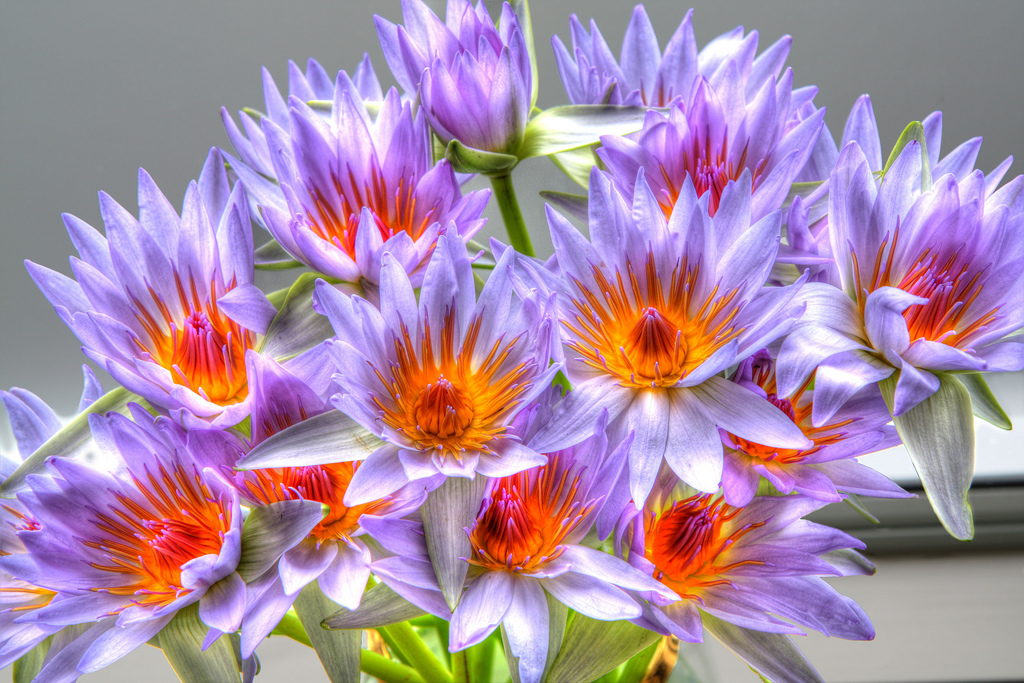
At the time the weather we were having was not ideal for photography – it was raining all the time! So I was reduced to some indoor shots. This is one:
I bought the flowers from Wright’s Water Garden in Mauku. (There will be pictures from this place later). The colours of these lilies was lovely – electric blue outside with bright orange inside.
Like a lot of HDR shots, the background was badly haloed, something I’ve grown to dislike a lot. So I used Photoshop to paint the grey background back in. The basic method you use to do this is:
- Select the image with the best background and load into Photoshop.
- Also load the HDR image
- Copy and paste the HDR image onto a new layer of the good background image. You want the HDR image to be on top.
- Create a layer mask on the HDR image layer
OK so not when you use a paintbrush tool to paint “black” onto the HDR image layer mask, you see the background image. If you paint white (which is the initial colour) you see the HDR image. And if you paint gray you get a mixture of the two.
So select a suitable sized brush and paint black on the layer mask so you reveal the good background. I probably have not explained this very well. Leave a comment if you need any clarification.
Waitangi Falls
After getting my EOS 450D I soon started lusting after new lenses. I saw a bargain on our local version of ebay (Trademe) for an EF-S 10-22mm. It was water damaged and going for a giveaway price. It said in the advert that it worked fine apart from some blurring
However I soon discovered that the operation was intermittent. Sometimes it would work fine, but most of the time it went crazy; the autofocus hunted and the aperture showed random numbers. So I sent it to the local Canon agent for service. Two weeks later it was returned as unrepairable.
So I took the lens apart. Managed to clean it so that the glass was all clear and the blurring was gone. But I could not get the electronics working, despite cleaning it very carefully. I was about to despair when someone on a forum suggested I ask Canon if they could supply a spare PCB. I asked them and they said they could, and for a very reasonable price, less than $100. So I ordered one and a few days later had a perfectly working EF-S 10-22mm lens, for a fraction of the new price.
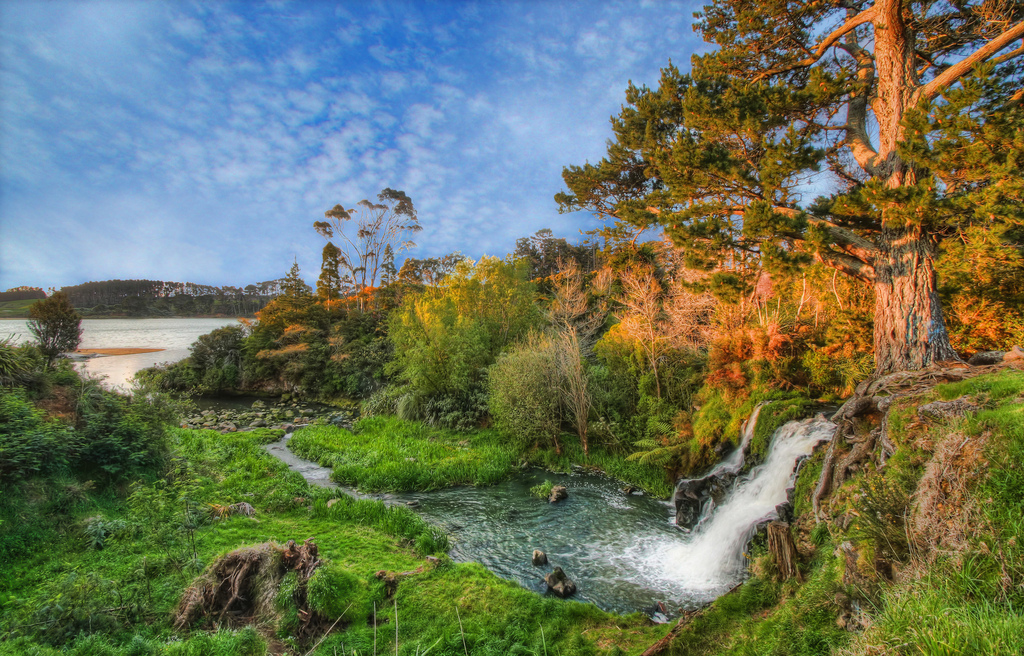
Here’s one of the early shots I took with it.
This is Waitangi Falls near to Waiuku.
The 10-22mm has become one of my favorite lenses. You do need to know how to use it though. One of the secrets is to get really close to things (like almost touching the lens). If you don’t you just get images where everything seems a long way away.
Klondyke Road
Klondyke Road is a gravel road that runs from Port Waikato to Onewhero, about 12 miles. It looked interesting on the map, and it was a nice day so I took my camera and tripod and set off. Now my car is quite large and not 4WD. As I progressed along the road it became narrower and narrower. And the passing places became fewer and fewer. I was dreading meeting something coming the other way and having to reverse mile or two to the nearest one.
Not only does the road get narrow, it gets higher, and there are steep drops with no guardrails on the side. So I took thing really slowly. I found out later than the Rally of New Zealand (one of the WRC rounds) passes along this road. I could not imagine travelling along this road at high speed..
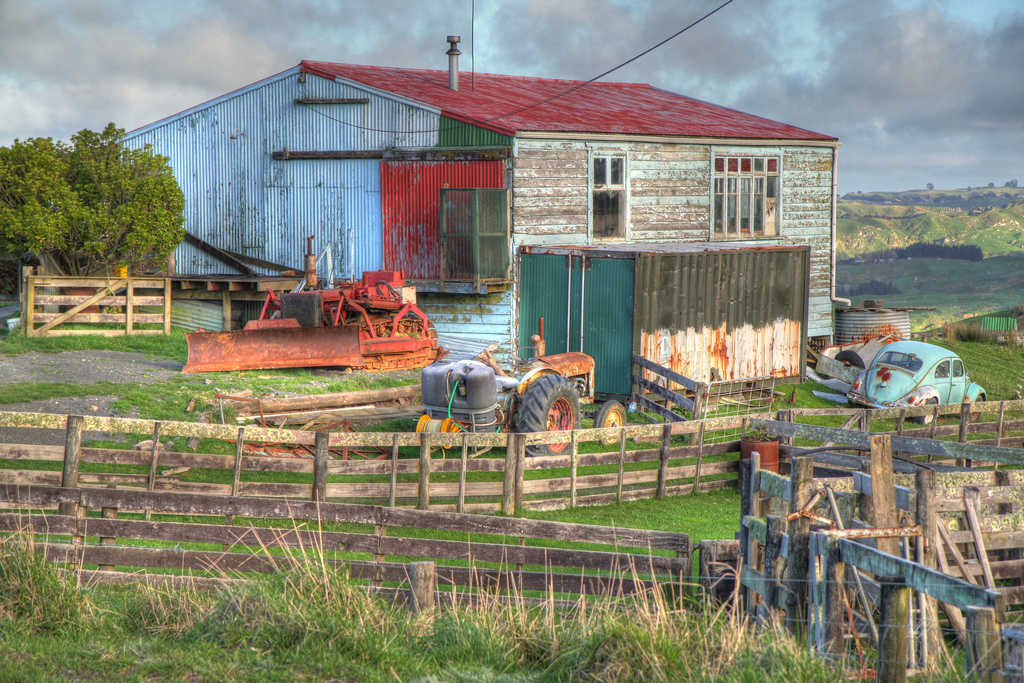
Somewhere along this road was this house. It sat alone on the top of a hill, with a magnificent view.
This shot looks really good when printed (for some reason) and I have a framed copy on my wall.
I’d taken along my new camera, a Canon EOS 450D. I bought this with a two “kit” lenses, 18-55mm and 55-250mm, both IS (Image Stablised). This was a big step up from my Panasonic Lumix. I now felt like I had a real camera.
The things that set it apart from my previous camera were:
- Viewfinder. I could not see exactly what it was I was going to shoot. No more squinting at an LCD panel on the back of the camera.
- Proper autobracketing. I could now control the autobracketing with up to +/-2EV. Also it was possible to set a 2 second timer so you can press the shutter and the three shots are fired off after a 2 sec delay, ideal for ensuring no camera shake on the tripod.
- Image Stablisation that really worked. Although not so useful for tripod work, for regular shots this is great
- Less noise. The amount of noise at ISO1600 was comparable to the Panasonic’s noise at ISO100
- Ability to have background out of focus and get real “bokeh”. With the Panasonic it always seemed that everything was pretty much in focus. Not really true, but the out of focus parts were only slightly out of focus.
- Much better user interface. The Panasonic was really fiddly to set up to get what you wanted. It was almost like they expected their users to just shoot on auto the whole time. The Canon UI on the other hand was intended to be used.
- Just better picture quality. Sharper, better color, contrast.
- And finally, it looks very cool and makes the Pansonic look like a toy.
I had a lot of fun with the EOS 450D, shooting about 3000 images in the first month. Now all I had to do was learn to take decent pictures. This is proving to be quite hard.
How It Started
I’ve been taking HDR pictures for about a year and a half now, since mid 2008.
I heard about this technique where you could merge several exposures to compensate for the lack of dynamic range of digital sensors. Being a geek I found this interesting and searched the web for more information. I came across Trey Ratcliff’s Portfolio. He also produces StuckInCustoms a photoblog that has new pictures daily. The pictures on his sites blew my mind. I’d never seen photos look like this before. They were so real; so beautiful and so evocative.
I had to have some of this.
It was obvious that Trey was a talented photographer, regardless of the HDR processing. I knew I would not be able to take photos that came close to his, but I thought I should be able to process pictures as well as him; being a (world class) geek has it’s advantages.
So I started by reading the StuckInCustoms HDR Tutorial, which I recommend to anyone. I learned about bracketing, Photmatix and much more. Soon afterwards I had downloaded the free trial of Photomatix and was taking some test shots to process.
At the time I had a “SuperZoom” Panasonic Lumix camera. This had the facility to auto-bracket. I thought it was a pretty good camera (at the time). But it soon became apparent that although I could learn the processing fairly easily, the art of taking good pictures was quite tricky.
I started looking around the web for tips on how to improve your photography. Composition was a key thing I learned about, something I’d all but ignored in the past.
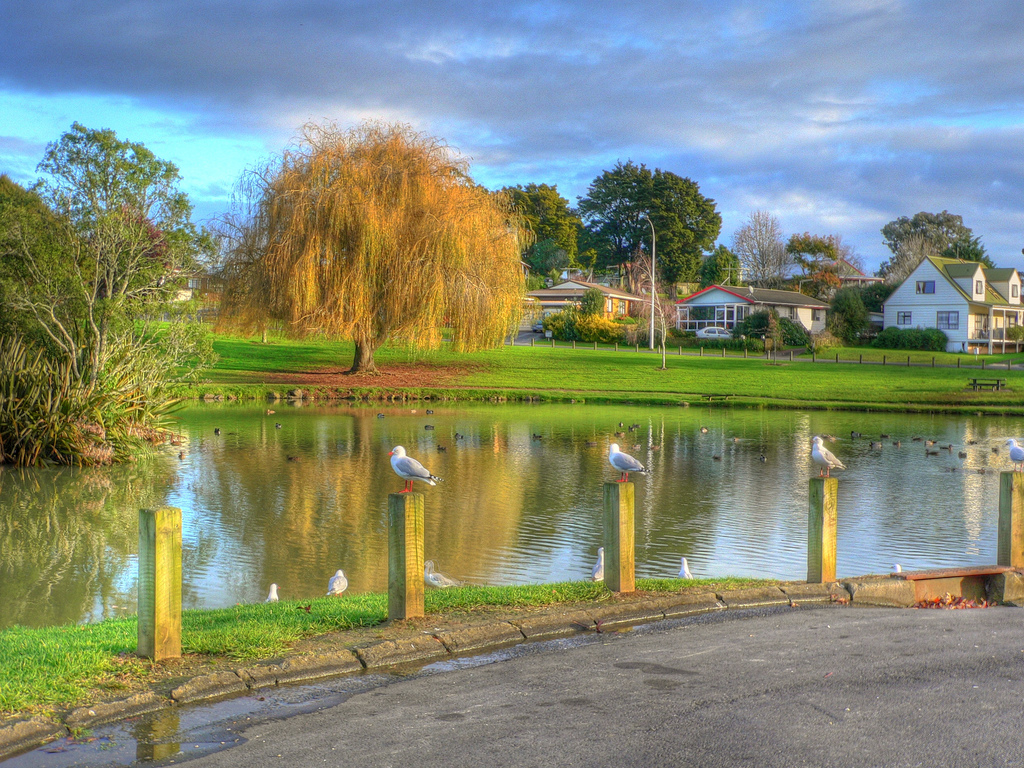
One of my first photo expiditions was to my local park. This picture of the pond is one of the first HDR shots that I considered good enough to show people.
The seagulls were kind enough to sit still for the whole 3 exposures. (By the way, this is what mid winter looks like in New Zealand, or at least where I live, which is just south of Auckland in the north island)
Also around this time I went to a friend’s bithday outing. We went to a Gun Club to have some fun shooting clay pigeons. This was in fact a lot of fun, firing real shotguns and even managing to hit some targets.
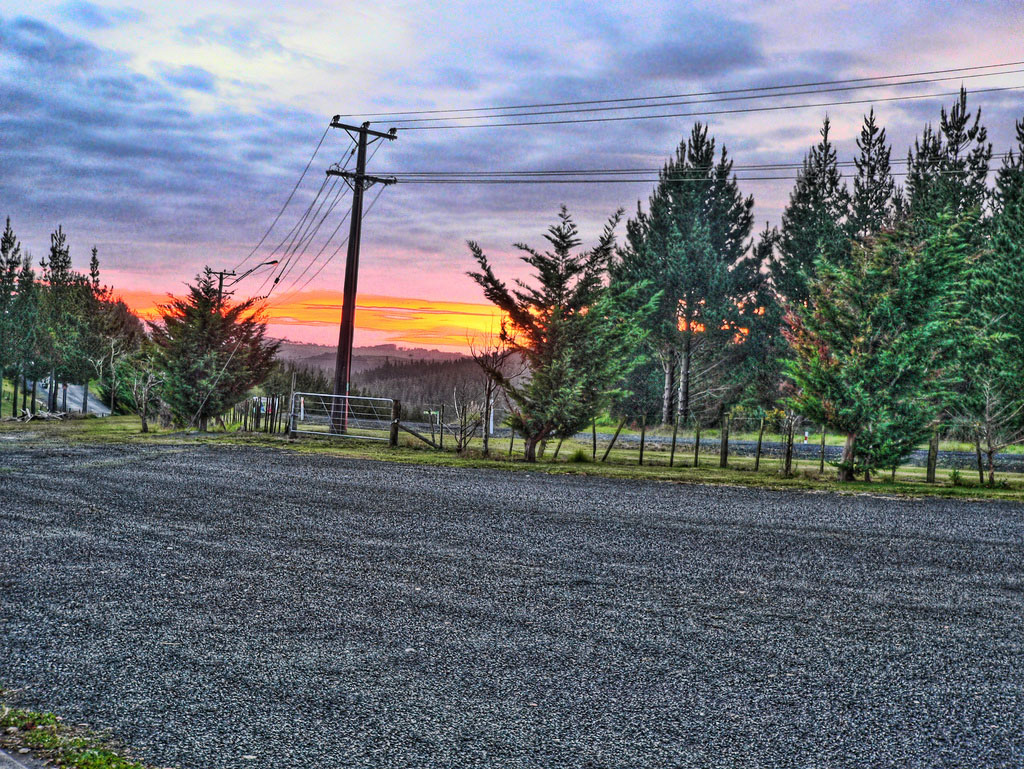
At the end of this the sun was going down so I whipped out the camera, still my Panasonic Lumix DMC-FZ20, and tripod, and took some pictures of the setting sun.
Now although this was not a great shot, it did have some of the “evocative” quality that I was seeking. For instance, the way the orange of the sunset fades into the misty treeline. Or the way you can almost feel the crunchy-ness of the carpark gravel.
This was going to be fun; learning to produce good HDRs.
It was time to get a proper camera…
Introduction : Kohekohe Church
This blog is intended to showcase High Dynamic Range (HDR) images taken in New Zealand. It will also give the story of my journey into HDR photography along with tips and tricks I’ve learned along the way.
Most of the images will be ones that I have taken and processed. But I plan to include other good NZ HDR shots as well.
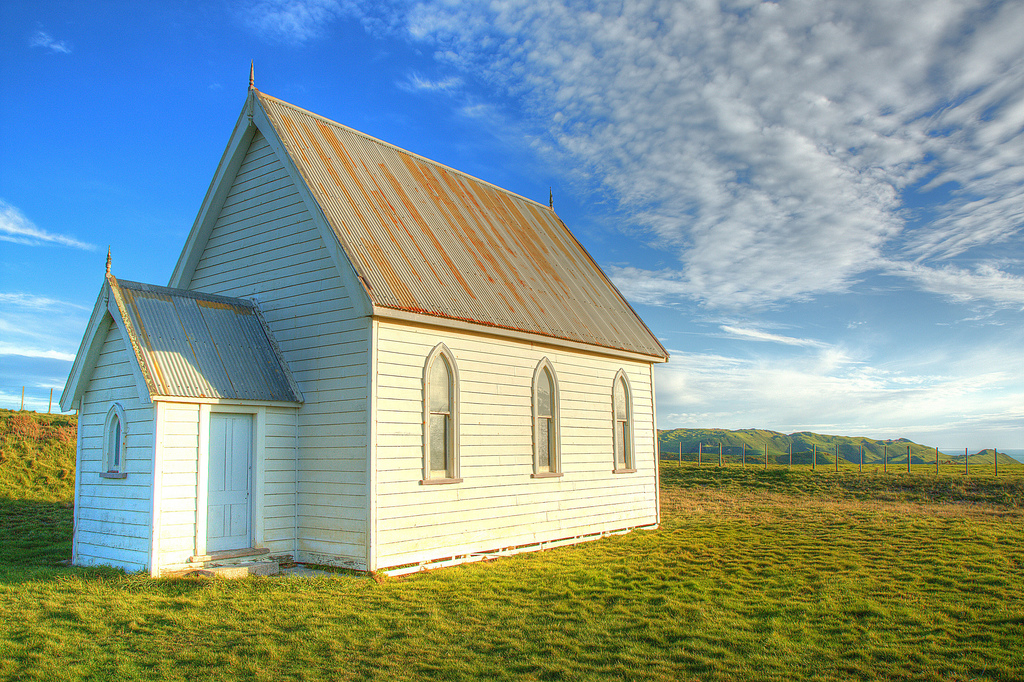
The first shot is one of my earliest HDR images, taken more than a year ago on 11-August-2008. I’d just got a new lens, an EF-S 17-55 and went out looking for shots to take. If I were doing this today it would look significantly different; the grass is too yellow; the church is too yellow in some parts and too blue in others. And I might use a wider lens. But at the time I was pretty pleased with this shot so it’s a good introduction to the sport, and shows the kind of result you can get with virtually no experience of both photography and HDR processing.
The church is located on the Awhitu peninsular in Franklin. You can’t see it in this shot, but there is a spectacular view from this location. When The Corrs were touring New Zealand a few years ago they were taken for a drive up the peninsular and when they came across this church and view they were so impressed that they decided on the spot to fly in a film crew so they could make a video in this location. You can see the result here.
The shot was taken with my Canon 450D, ISO 100, EF-S 17-55 and processed with Photomatix.
